Streaming FAQ
Learn how to go live with peerStream, configure your encoder, and understand what viewers will see.
How do I start streaming?
peerStream broadcasts work best with OBS Studio. Install OBS on the computer that will host your stream, then use the stream credentials shown in your peerStream dashboard.
- 1. Create a scene, add your sources (camera, screen, or media), and check your audio levels.
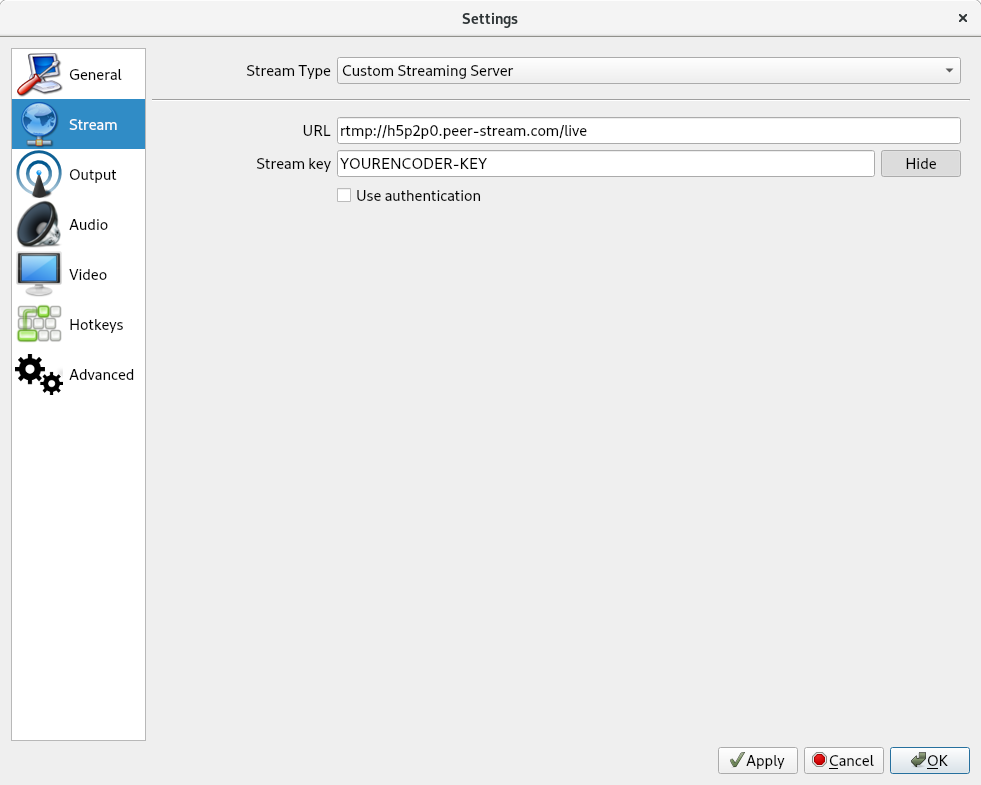
- 2. Paste the Server URL and Stream Key from peerStream into OBS.
- 3. Click Start Streaming. Your channel will go live within a few seconds on peerStream and anywhere you’ve embedded the player.
What encoder settings does peerStream recommend?
Configure OBS with CBR rate control, a keyframe interval of 2, and the Main H.264 profile. These values keep your live stream synced with the peerStream player.
Update OBS to Advanced Output mode:
- File → Settings → Output
- Switch Output Mode to Advanced
- Enter the values below in the Streaming tab
| Resolution / FPS | Video Bitrate | FPS |
|---|---|---|
| 1080p / 30fps | 3000 - 3500 kbps | 30 |
| 720p / 60fps | 2500 - 3500 kbps | 60 |
| 720p / 30fps | 1500 - 3000 kbps | 30 |
| 480p / 30-60fps | 500 - 2000 kbps | 30 - 60 |
| 360p / 30fps | 400 - 1000 kbps | 30 |
Live streaming is forgiving — you can experiment with different bitrates or resolutions depending on the strength of your connection. Lower the bitrate first if you notice dropped frames.
What should I expect to see in the player?
When you go live, the peerStream player updates in real time for viewers on your channel and on any embeds you’ve shared. Use this preview to confirm you are sending audio and video before promoting the broadcast.
Tip: Keep the preview muted to avoid echo while monitoring your live stream.